You haven't signed in yet, you can have a better experience after signing in
 Sublime Merge Git visualization tool software

Activity Rules
1、Activity time:{{ info.groupon.start_at }} ~ {{ info.groupon.end_at }}。
1、Activity time:售完为止。
2、Validity period of the Group Buying:{{ info.groupon.expire_days * 24 }} hours。
3、Number of Group Buying:{{ info.groupon.need_count }}x。
Please Pay Attention
1、Teamwork process: Join/initiate a Group Buying and make a successful payment - Within the validity period, the number of team members meets the activity requirements - Group Buying succeeded!
2、If the number of participants cannot be met within the valid period, the group will fail, and the paid amount will be refunded in the original way.
3、The number of people required and the time of the event may vary among different products. Please pay attention to the rules of the event.
Faster working methods
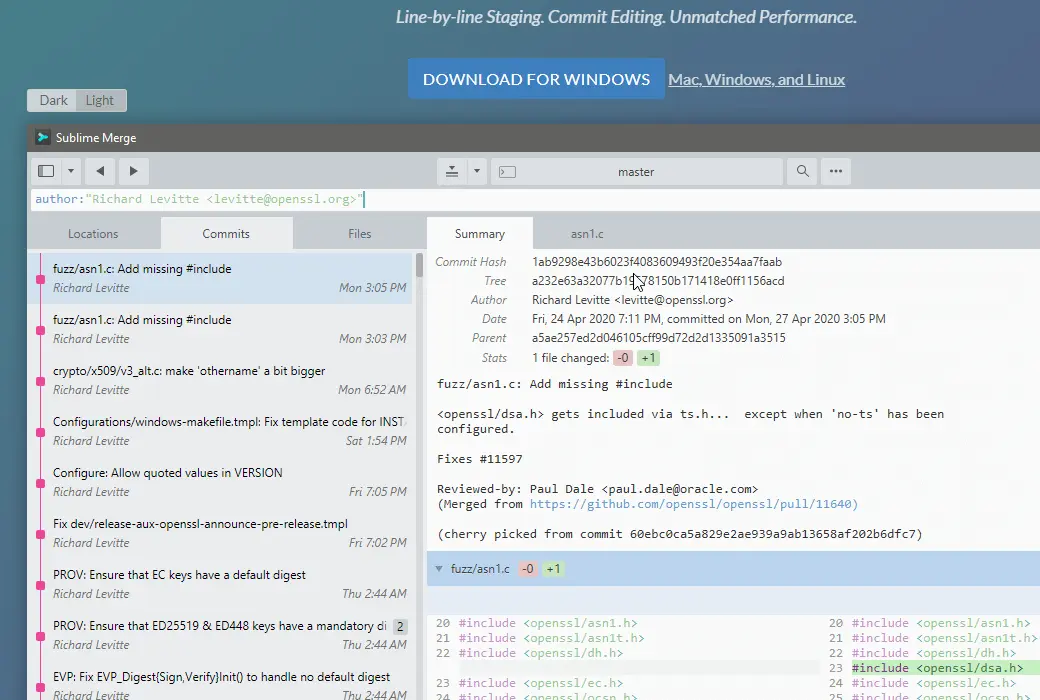
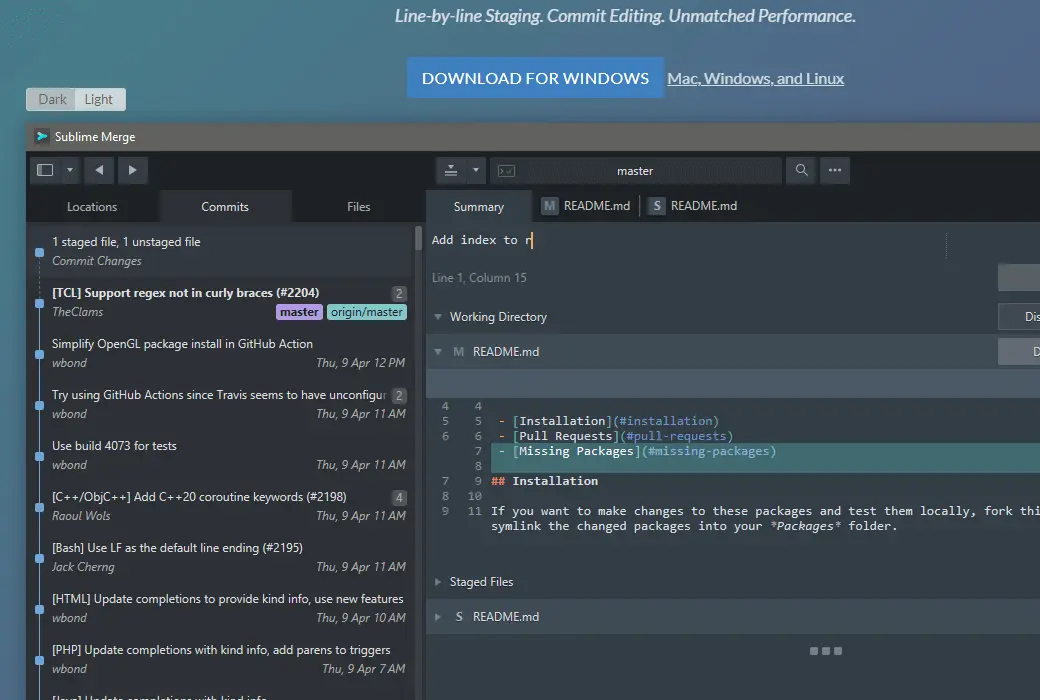
With the Zippy cross platform GUI toolkit, unparalleled syntax highlighting engine, and custom high-performance Git reading library, Sublime Merge sets standards for performance.
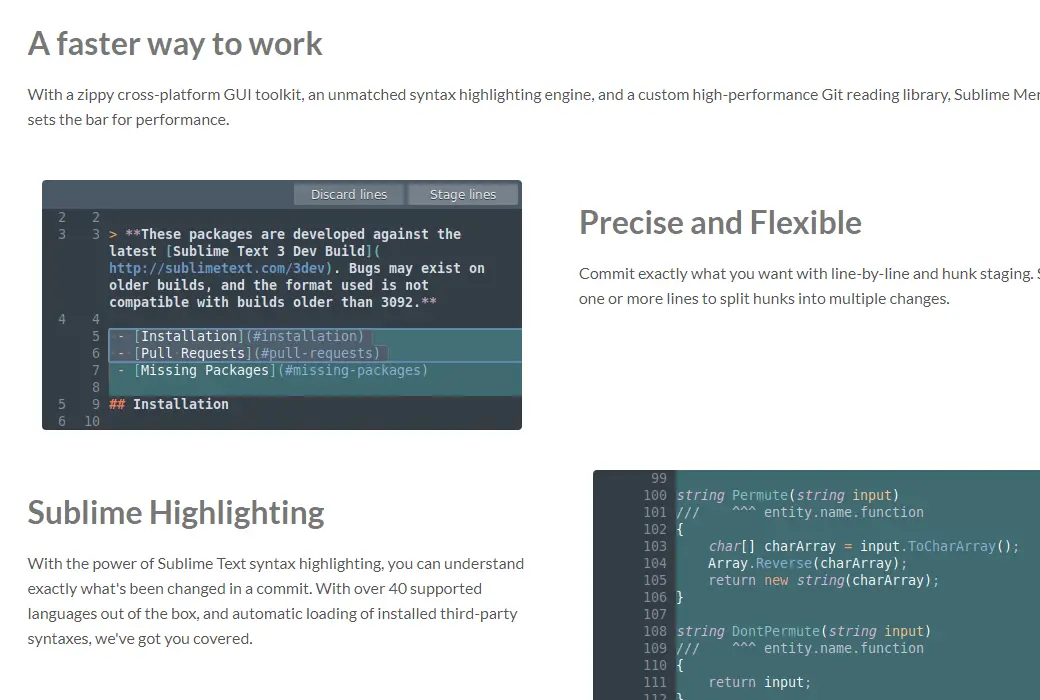
Accurate and flexible
Accurately submit the content you want through line by line and a large number of installments. Select one or more rows to split a large block into multiple changes.
A sublime highlight
With the powerful features highlighted by Sublime Text syntax, you can accurately understand the changes that occur during submission. We support over 40 out of the box languages and automatically load installed third-party syntax, providing you with protection.
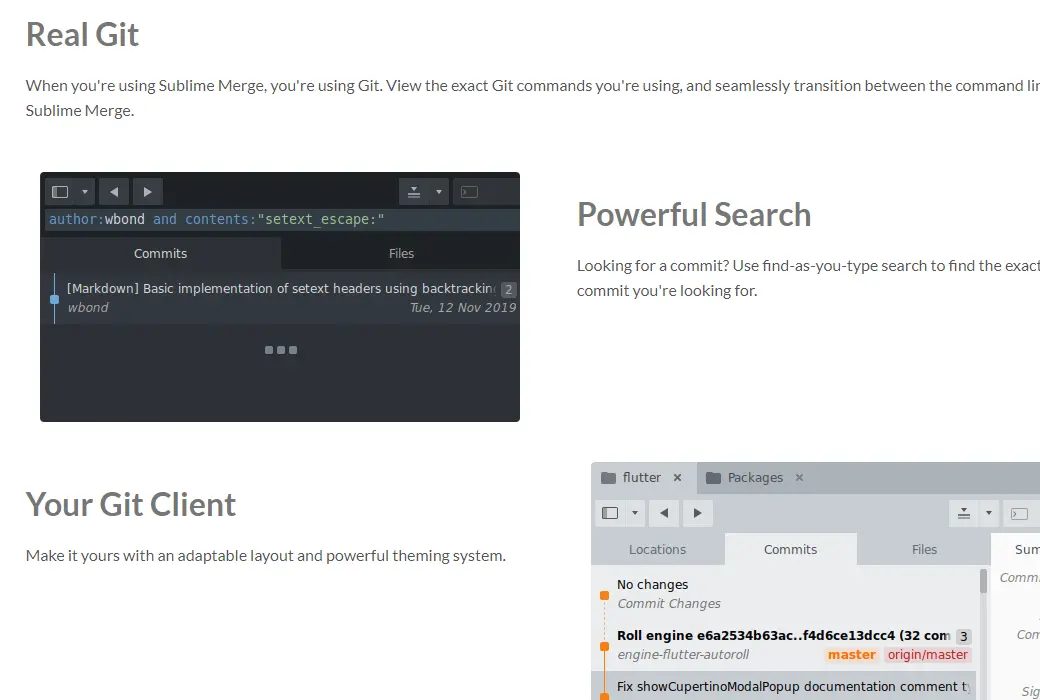
True Git
When you use Sublime Merge, you are using Git. Check the exact Git command you are using and seamlessly transition between the command line and Sublime Merge.
Powerful search
Looking for submissions? Use find as you type search to find the exact submission you are looking for.
Your Git client
Use a highly adaptable layout and powerful theme system to make it your exclusive.

Official website:https://www.sublimemerge.com
Download Center:https://sublime-merge.apsgo.cn
Backup Download:N/A
Delivery time:Manually processing orders
Operating Platform:Windows、macOS、Linux
Interface language:Supports Chinese interface display and multiple language options.
Update Description:The commercial version is free to update and use for 1 year. The personal license comes with a 3-year renewal.
Trial before purchase:30 day free trial.
How to receive goods:After purchase, the activation information will be sent to the email address at the time of placing the order, and the corresponding product activation code can be viewed in the personal center, My Orders.
Number of devices:Authorize users to install all their own computers.
Replace computer:Uninstall the original computer and activate the new computer.
Activation guidance:To be added.
Special note:To be added.
reference material:https://www.sublimehq.com/store/merge

Any question
{{ app.qa.openQa.Q.title }}
How to use Sublime Merge?
Sublime Merge is easy to get started with. In this guide, you will see all the steps required to get started.
1The Clone existing warehouse
The first step when using Git is usually to clone an existing remote repository. This process will create a copy of the remote repository on the local computer so that you can start making changes.
The items you need
- Remote Warehouse URLExample URL:
https://github.com/sublimehq/Packages.git - (Optional) Remote warehouseIdentity verification information
(It may be the username and password you use to authenticate remote services)
Steps to Clone a Warehouse
- pass through
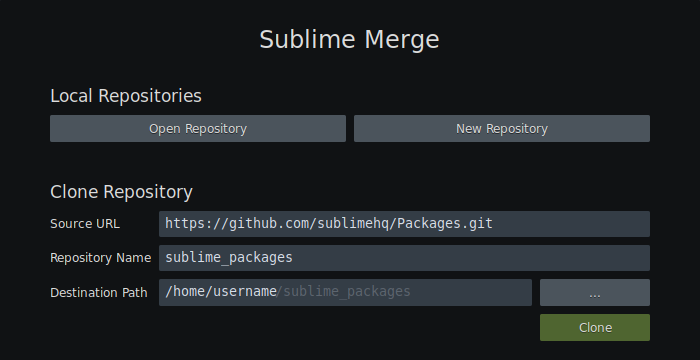
File Clone Repository ▶ Clone repository ..)Navigate to the clone page.Sublime Merge automatically opens this page on its first run (as shown below) - Paste the remote repository URL into
Source URLinput - use
Destination PathEnter the path to set the local repository. This is the location where the repository will be cloned - (Optional) Use
Repository NameEnter to change the name of the local repository. This is the name of the repository (stored as a folder on disk) - select
Clonebutton
After cloning is complete, the repository will automatically open in Sublime Merge.
2The Create a new repository
If you are starting a new project, you may want to initialize a new Git repository instead.
Steps to create a new warehouse
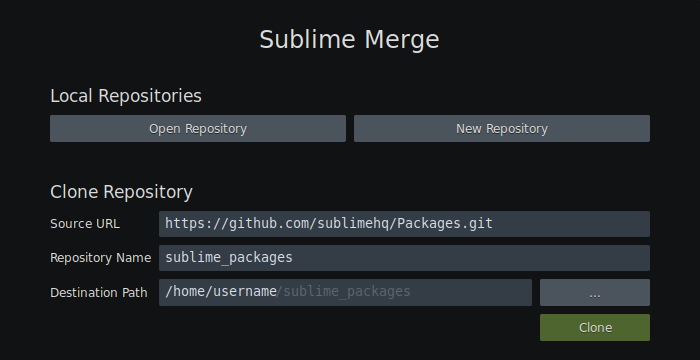
- Open Sublime Merge and select
New Repositorybutton - Select the folder to initialize as a Git repository
After completing this task, the new warehouse will automatically open in Sublime Merge.
3The Understand the interface
The Sublime Merge interface consists of two main parts-OverviewandDetailspart.
Overview section
The overview section aims to display a summary of the repository.
It containsLocationsColumnCommitscolumn sumFilesColumn - Each column will be introduced below.

position
LocationsColumn displays all branches, remote, label, storage, and submodules contained in the repository.
You can select each item to display its position in the commit graph (excluding submodules). Each project also has a context menu displaying common works.
submit
CommititsColumn displays all submitted charts contained in the repository. The submission diagram is drawn as a series of submission abstracts, which are connected by colored lines (representing the topology of the submission).
Each submitted abstract contains useful information, such as the submission message and author, as well as any associated branches. The context menu for submitting abstracts also includes common works.

After selecting to submit the abstract, the detailed information of the selected submission will be displayed inDetailsPart of it.
Multiple submissions can be selected to perform batch work, such as OR submissions. If multiple submissions are selected, thenDetailsThe difference between the first and last submissions will also be displayed in the section.squashingdropping
file
FilesDisplay a list of all files associated with the current selection.
If no submission is selected, the file list will display allUnmergedTheModifiedTheUntrackedandStaged (temporarily stored)File.
If you choose to submit, the file list will display all the files that have been changed in the selected submission.
Detailed Information "section
The details section displays a detailed view of the selected item in the submitted image.
Pending changes
When no submission is selected in the submitted image, the current status of the working directory and index will be displayed in the details section. Here, you can prepare and create new submissions.
Will be provided for eachUnmergedTheModifiedTheUntrackedandStaged (temporarily stored)The file shows a difference. Each file has an associated tab that can be selected to view changes made to individual files.

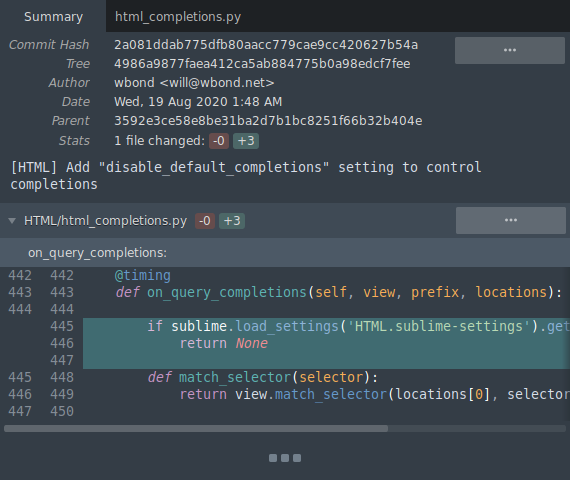
Submit detailed information
After selecting submit in the submitted image, the detailed information of the selected submission will be displayed in the details section.
Submit metadata (such as submission message and author) displayed at the top of this section.
Below the submitted metadata is a list of all changed files and their associated differences (changes).
4The Using the Command Panel
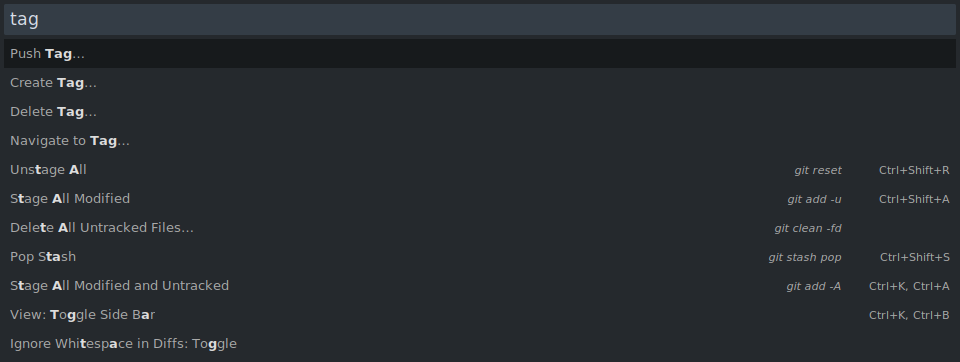
The command panel is a quick way to access a large number of commands available in Sublime Merge.
For example, renaming a branch or navigating to a label
You can do it throughtool ▶ Command palette ..Or throughCtrl + p (Cmd + pSuitable for MacOS).
The command panel displays a list of commands that can be filtered by typing the command name section you want to find.
You can also add your own custom commands to the command panel. (Customize Command Panel)
5The Create Submission
After making changes to any local files in the warehouse, your changes will be displayed inPending changesPart of it.
The modified file will be displayed inWorking DirectoryIn some sections, the new file will be displayedUntracked FilesPart of it. To submit new changes to the local repository, you first need to temporarily store the changes.
Use Sublime Merge to temporarily store changes
- Temporarily store the entire file: select the top of the file“
Staging files”Button - Temporarily store the entire block: select the top of the file“
Temporary storage block”Button - Temporary single row: Select the single row to be temporarily stored, and then choose“
Temporary storage line”
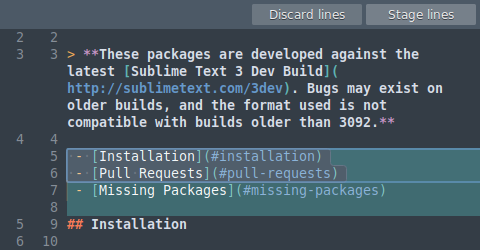
Check your changes before submitting
You can scroll to the summary pageStaged filesView the changes temporarily stored partially. Alternatively, you can select each temporary file tab to view files separately.
Submit changes for temporary storage
Firstly, use the submit message input located at the top of the screen (by default). After entering the submission message, selectCommit (submit)Button.

6The Repair and edit submission
You may make a new submission only to discover that you have made a mistake. Perhaps the submitted information is incorrect, or you forgot to include the file in the submission.
Sublime Merge provides top-notch support for editing submissions to handle these situations.
Edit and submit message
To edit a submission message, simply open the submission context menu and selectEdit submission ▶ Edit and submit messageJust enough.
Now, you canDetailsPartial input of new submission message. After being satisfied with the changes, chooseSave.
Edit and submit content
Edit recent submissions
To edit recent submissions, you can useAmendFunction.
First, edit the file to be changed in a text editor, and then use Sublime Merge to temporarily store the changes. After temporarily storing the changes, select the dropdown button next to the submit button, and then chooseRevise the previous submission (-- amend).
Git will now merge the temporarily stored changes with the previous commit.
Edit older submissions
If you want to edit older submissions, you can useEdit Submit ContentsFunction.
Find the submission you want to edit, open the context menu, and then selectEdit submission ▶ Edit submission contentThe selected submission will be revoked, and you will have the opportunity to update the submitted content. After being satisfied with the changes, please useCommit 'submit'Button to resubmit.
selectContinue rebaseButton to complete editing. If you have made a mistake and want to stop editing, please selectAbort rebaseButton.
Please note that editing older submissions may result in merge conflicts that need to be resolved. Please check:Resolve merge conflicts.
Explanation on Editing Submission
Editing a commit will create a new commit and hide the old one (due to the working mechanism of Git). In addition, editing submissions locally will not update any remote submissions. If the submission you are editing has been pushed to a remote repository, please proceed with caution.
If this is the case, you need to executePush -- force with use (available in the advanced push menu)Submit updates to push. This will tell the remote repository to overwrite the remote submission with the updated submission (provided that no one updates the remote submission during this period).
7The Create a branch
Create a new branch through the command panel
Open the command panel (seeUsing the Command Panel)And chooseCreate Branch ..
Create a new branch by submitting a diagram
Open the existing submission context menu in the submitted image and selectCreate branch at commit ..
Create a local branch from a remote branch
Open the location bar and findRemotepart. Right click on the remote branch and selectCreate a local branch from Create a local branch) ..
8The Push pull
You need to push and pull to share your work with others. This is accomplished by pushing and pulling submissions to remote repositories.

Push and Pull buttons
You can use the button located in the upper right corner of the interface to perform basic push and pull operations. For advanced push and pull options, you can choose the dropdown button located next to the main button.
9The Merge branches
Merge through location bar
- exist
LocationsFind the branch list in the column - In the branches list, find the branch you want to merge into the current checked out branch
- Open the context menu for the given branch and select
Merge {branch1} into {branch2}
Merge by submitting images
- In the submission diagram, find the branch to merge into the current checkout branch
- Open the context menu for the given branch and select
Merge {branch1} into {branch2}...
Merge through the command panel
- Open the command panel (seeUsing the Command Panel)
- Search and select
Merge branch .. - Find and select the branch to merge into the currently checked out branch
10The Resolve merge conflicts
When merging changes into the same file, Git will attempt to automatically merge the changes. If it cannot automatically perform this task, it will mark the file as unmerged and you must manually resolve the merge conflict.
To resolve merge conflicts, you can use the merge tool provided by Sublime Merge.
Steps to resolve merge conflicts
existPending changesPartially found files that have not been merged.
In the unmerged file title, you will seeResolveYou can select this button to open the merge tool.
Merge tool
The merge tool consists of three columns: Ours on the left, Merged in the middle, and Theirs on the right.
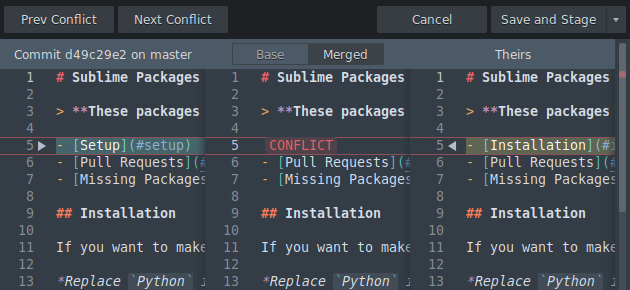
Merge tool
OursandTheirsCorresponding to conflicting files, andMergedCorresponding to the generated merged file. You can also chooseBaseTo display the merged Base file.
Conflicting changes will be displayedCONFLICTMarking. You can use the one located next to the conflict block ▶ perhaps ◀ The button selects the conflict changes to be accepted.
After resolving all conflicts, you can chooseSave and stageSave the merged file and temporarily store it. Alternatively, you can chooseCancelAbandoning changes.
11The Add remote
To push the submission to a remote repository, you may need to add a new remote repository.
Add remote through the command panel
Open the command panel (seeUsing the Command Panel)And chooseAdd Remote ...
You can also find it in the command panelDelete Remote ..andRename Remote ..Command.
12The Set up upstream
The upstream branch tells Git which remote branch is associated with the local branch (and is used to indicate where to push new commits).
Set up upstream branch through the command panel
- Open the command panel (seeUsing the Command Panel)Then choose
Set Branch Upstream... - Find the upstream branch to be set for and select it
- Find the remote branch you want to set as upstream and select it
Set upstream branch through location bar
- exist
LocationsFind the branch list in the column - exist
BranchesIn the list, find the branch for which you want to set upstream - Open the context menu and select
Set Upstream .. - Find the remote branch you want to set as upstream and select it
13The Remote authentication
When making changes to a remote warehouse, you may need to provide authentication.
Git supports two connection protocols when accessing remote repositories: and Each of these protocols requires different types of authentication, as described below.HTTPS SSH
Authentication via HTTPS
When performing authentication required actions on the repository using an HTTPS connection, an authentication dialog box will be displayed. Enter the username and password used for authenticating the remote repository, and then selectOKButton.
You may not want to enter your credentials every time you perform a push or pull. In this case, you can use Git's built-in password manager to cache credentials for a period of time. To do this, please open Sublime Merge and navigate totool ▶ Password cacheYou can request Git to store the credentials for up to a week.
Please note that this only applies to Linux and MacOS. For Windows users, you can use Git certificate manager for Windows. (Seehttps://github.com/Microsoft/Git-Credential-Manager-for-Windows)
Authentication via SSH
For SSH authentication, Git will attempt to use storage in~/.ssh/The default SSH key is used for authentication. The system may require you to unlock the key, in which case you can enter the password associated with the SSH key to continue.
The persistent storage of SSH credentials depends on the operating system. For most Linux distributions, you can automatically unlock SSH keys at startup. For MacOS, you can add SSH credentials to the system keychain. For this, please run from the consolessh-add -K PATH_TO_KEYFor Windows, you can use plink/pageant to connect and store SSH credentials.
Windows: Use Sublime Merge to set PuTTY/plink/pageant
This guide assumes that you have an existing SSH key that can import PuTTY. without,Please read this guide first.
- First, download and install herePuTTY
- After installation, open PuTTYGen and select
Conversions ▶ Import Key. - Select your existing RSA key (which may be
~/.ssh/id_rsa.pub(Found in) - After importing, save a copy of the private key to the same folder
Now that the key has been saved, you can enable plink/PUTTY in Sublime Merge through your preferences.
- Open Sublime Merge and select
Preferences ▶ Preferences .. - Navigate To
seniorIn the preferences dialog box. - Navigate to the SSH path and set it as the plink system path (which may be
C:\Program Files (x86)\PuTTY\plink.exe).
Now Sublime Merge is using plink, the last optional step is to launch Pageant and load your credentials. This ensures that you don't have to enter SSH credentials every time you perform remote work.
- Launch Pageant executable file
- After startup, you will see the Pageant icon in the system tray. Right click on the icon and select
Add Key. - Find and select the private key you previously saved
It is worth noting that if you want to cache SSH credentials, you must start Pageant every time you start a Windows session. Pageant can be added to your Windows startup folder, but it is not covered here.


